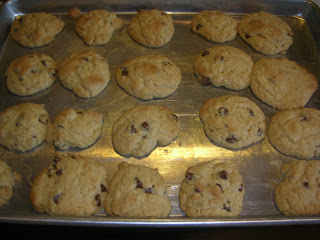
My daughter did this experiment for her science fair project, and I decided to steal her work and publish it on my blog. We recently had a chat about how the world is not fair, so I’m sure she will be fine with it!
First, she made a batch of chocolate chip cookies using shortening. The recipe came, I think, from the chocolate chip bag. I’ll reproduce it here, just in the interest of clarity.
1 cup shortening
1 cup brown sugar
1/2 cup sugar
2 eggs
1 tsp. vanilla
1 tsp. salt
1 tsp. soda
2 cups flour
1 package chocolate chips
Bake at 375 degrees for 8-10 minutes
She followed the recipe, except that we used only about half the chocolate chips called for. The shortening cookies turned out pretty much as expected, lovely and soft and delicious.

She then made a batch of cookies, substituting butter for the shortening. The first thing we realized is that the dough is much softer, and required more flour. We added about 1/2 cup extra flour. I could maybe have used even a little more. This is because butter naturally has more water in it than shortening, and hence more moisture in the dough.
The butter cookies spread a fair amount during baking, and when they came out of the oven, most of them had spread into each other, leaving us with the half-round half-square creations that have to be cut apart with the sharp end of the pancake turner. They were not pretty.

They also did not puff up as much as the shortening cookies. The lower melting point means the dough just spreads and flattens during baking. Shortening dough tends to hold its shape better.
She asked several people to taste test the cookies. She gave them one cookie from each batch, and they had to comment on the taste and the texture of each cookie. Most people liked the butter flavor better, but the texture of the shortening cookie better. As expected.
If you do make your chocolate chip cookies with butter, keep these things in mind:
First, make sure the recipe calls for butter and not shortening. Shortening recipes have more moisture in them. Baking cookies is chemistry, and getting the mixture right is crucial to a quality product. I recommend this recipe if you want butter cookies.
Second, refrigerate the dough before baking. This will not only let the flavors combine in wonderful ways, but will also prolong the melting point a little, causing less spread during baking.
Third, be sure to place dough on a cooled cookie sheet. If the sheet is hot when dough is placed on it, the dough will begin to melt even before baking, and the cookies are more prone to spreading.
Fourth, let the cookies sit for 2-5 minutes on the cookie sheet after coming out of the oven. Butter cookies have a much softer texture, and are more likely to fall apart upon removal from the cookie sheet. Give them a couple minutes to cool and set up before removing them to a cooling rack.


